Saturday, June 29, 2013

Welcome Baby

Somehow having our babies seems like yesterday and a lifetime ago at the same time.  I found the most adorable stamp/die set and matching paper at Archiver's yesterday!  It's Doodle Bug/Sizzix Baby Boy and the 6x6 pad is Sugar & Spice.  You all probably already know about it, and I've probably seen it on some of your cards too (and said, "awe!"), but seeing it up close and personal got me reaching for my wallet!  Too bad this wasn't around when I was putting those baby albums together. Thankfully, I can make cards with it to my hearts content!  The only problem is I have to cut into that sweet paper and some of it will be on the back side!


I needed to find a good sketch so I could get busy.  I found this week's CAS(E) this Sketch and I was good to go!


The twine and google eye were a Hobby Lobby brand and the buttons were from my little button collection.    I stamped the giraffe on the yellow DP and colored the details with a couple of YR Copics.  There is a die to cut him out, but I opted to fussy cut instead.  The frame was cut with Spellbinder dies.

Thanks so much for coming over for a visit!
Enjoy the rest of your weekend.
Kara Lynne

Friday, June 28, 2013

Free Indeed!

The cue card at CASology says, "Free".  As soon as I saw it, this Bible verse came into my head:  


I typed the verse in WORD.  The font is joeHand 2.  This is actually a little 4x5 1/2 notecard, but who can tell by the huge picture, right?  I used the butterfly stamp and a leafy stalk stamp from the Fancy Pants Delight set.  The inks are Distress Inks: Spiced Marmalade, Worn Lipstick, and Ripe Persimmon.  I used foam adhesive to adhere it to the notecard.

Again, this card was inspired by the challenge over at CASology:


I thought I'd also link up to Simon Says Stamp Challenge Blog:  Anything Goes.
 

Thanks for coming over for a second visit today!
Have a wonderful weekend!
Kara Lynne

LOTV Doggie Delight

The challenge over at Lili's Little Fairies is 1 image, 2 patterned papers, and 3 embellies/types of embellies.  There's also just a little time left to squeeze into the LOTV Ideas to Inspire monthly challenge, Use a Sentiment.  So here's how I was inspired:


The 1 image is LOTV Doggie Delight.  The 2 patterned papers are from My Mind's Eye The Sweetest Thing.  The 3 types of embellies are Silhouette die cut flowers, sequin flowers, and brad flowers.  The sentiment is LOTV Mixed Circular Sentiments, which I love!  I cut the border on the Silhouette too, but the scallop mats are Sizzix.  I colored the image and paper flowers with Copics.

Thanks for coming over to visit, I hope you're having a great day!
Kara Lynne

Tuesday, June 25, 2013

The Color of Love Part 2

Oops, I didn't realize I couldn't link two cards from one post.  Or maybe I can, but couldn't figure it out.  Anyway, I'm just copying the second half of the last post to link it to the challenges.

Here's my second card:


Okay, I admit, I was getting carried away when I put Glossy Accents on their noses.  I scribbled the lines connecting to the sentiment.  I used Party Posse, Spring Fling, the drop of paint is from Sugar Rush.  All papers were in my stash.

This card was inspired by CAS-ual Friday's Over the Edge, and Paper Smooches SPARKS Picture Perfect Challenge.

CFC106

Thanks for coming over to visit!
Have a great day,
Kara Lynne

What is The Color of Love?

Oh shoot me now, I've been coming up with all kinds of sappy song titles for this week's Paper Smooches SPARKS photo! Not intentionally, but as you can see by my card's sentiment, Captain and Tennille won't get out of my head!  I was inspired by both the SPARKS challenge and CAS-ual Friday's challenge because it's all about love bridging the gap.  The various browns represent skin tones.  The card front is actually two separate pieces linked together by the sentiment panel (the off the edge part).  The colorful arrows (like the points of the crayons in the SPARKS photo) represent a forward movement of acceptance and appreciation for all God's creation.  The trickiest part of this card was to stamp the sentiment.  It's a mixture of words and letters from about five different stamp sets.  I'll list them below.

Here's the run down of the sentiment:
Love= Squeaky Clean, love machine
Will=   Squeaky Clean m from love machine  Cuteasaurus, good tri, Perpetual Bliss, Let the good times roll.  Keep= Perpetual Bliss, It's fun o'clock, My Peeps, how tweet of you, Perpetual Bliss, Let the good times roll (d for p).
Us= Smarty Pants, bus
Together= Alphadots
I cut the arrows on the Silhouette and free hand cut the heart.  Gems are from Recollections.


Now we move from symbolic to silly!


Okay, I admit, I was getting carried away when I put Glossy Accents on their noses.  I scribbled the lines connecting to the sentiment.  I used Party Posse, Spring Fling, the drop of paint is from Sugar Rush.  All papers were in my stash. 


CFC106

Thanks for coming over to visit!
I hope you have a great day,
Kara Lynne

Sunday, June 23, 2013

My Craft Space and Storage

I thought I'd share my crafting space with you today.

The space consists of three areas.  First is the kitchen.
This little desk holds all the small tools.  I keep that tool bag and ink blenders on the desk unless people are coming over, then I put them in my paper cabinet (more on that later). 


The drawer above the chair holds punches and small embellishments (forgot to take a photo).  The top right drawer contains ink and some paints.

The second drawer is all embossing tools and powder, glue, flock, glimmer mists, and stamp blocks.

The bottom drawer is markers, water colors, and mats.

I needed a container for my Copics that I could keep in a drawer, but would easily pull out.  I found this in the picnic section at Target.  It is divided into three on one side, and I cut chipboard and slatted it to divide the other side into six sections.

Here's a view of the desk in the room.  


We made the table top out of laminate so I can get it messy to my hearts content.  The table and chairs were a 2nd hand store find that we painted.  The China hutch was a 2nd hand store find too.


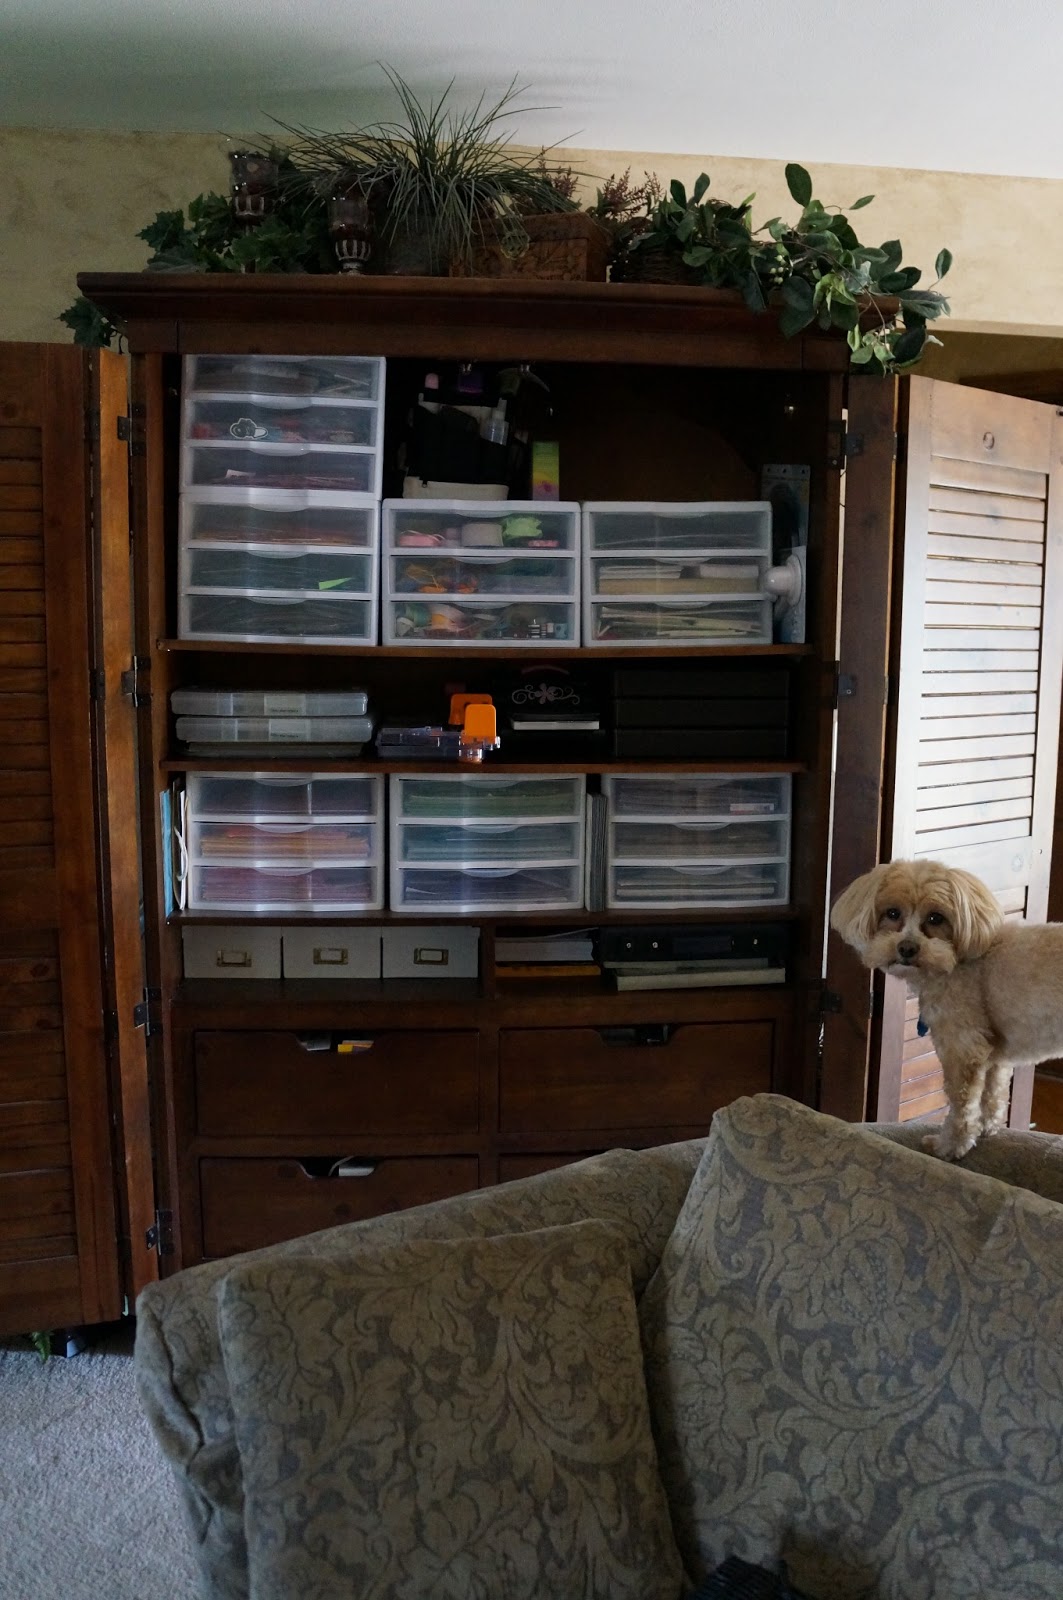
My paper cabinet had to go in the living room.  This was a wardrobe we got for free from some people who didn't want to move it.  It is a heavy monster, but I love it!  That's little Remington on the couch there.


On the top shelf sits drawers of scraps by color family, embellishments, ribbon, templates, and small paper pads.  I have a tool bag that holds lesser used tools, and there's room there for the things that usually sit on my desk.  A couple of circle cutters are on the right side.


The second shelf holds my two 12x12 working project cases.  One is for cards and one is for scrapbook pages.  Next to that is my paper cutter, followed by the Big Shot.  Scrapbooks in progress are on the right.  The next shelf down has drawers containing 12x12 paper according to color.  The next shelf down has boxes of extra photos, white Wal-mart cardstock, and a binder with rubber stamps that I converted to cling.  The box under that contains chipboard.


Then there are these four great drawers!  Top left holds blank cards and envelopes.  Top right holds stamp sets and dies.


The bottom left drawer hold reinkers, 5" Xyron, and light box.  The bottom right holds more stamp sets, large wooden block stamps, foam stamps, and embossing folders.


Almost done, if you're still with me, I'd like to show you the third area: the study.  This was a dining room when we bought the house, but Gene works from home a lot.  He made those shelves all by himself!  The desk was my dad's so it has special memories for me.  This is where I blog, print out journaling, and cut things on my Silhouette.  If you notice the photo albums, that's because I scrapbook the kid's albums, but put family photos in regular sleeves.  Some of those are empty, I bought enough so I could keep them the same.


My Silhouette fits in the drawer, but I think there's room in there to upgrade to the Cameo!


I hope you enjoyed the tour.  I love to peek into other people's craft rooms, so I thought I'd share.

Have a great day!
Kara Lynne

Friday, June 21, 2013

A Shellebration!

Just a quick post before I leave to pick Elle up from a week at Bible camp.  She's an independent soul, and loves camp, but this Momma is so ready to have her home.


I've been watching some of your amazing stamping skills and thought I'd try a sentiment background of my own.  The Shadows speech bubbles are clear embossed.  I used both sides of the stamp to get them all to point to the little guy.  I used Party Posse with Distress Inks: Shabby Shutters, Tumbled Glass, Peacock Feathers, and Mustard Seed.  


I realized when I looked at the close-up that I need to go back and green up those grass edges.  The papers are DCWV Citrus Stack, The Paper Studio Khloe Lane, and the green polka dots is Anna Griffin.  The yellow floss is Hobby Lobby.

This card was inspired by the Cool Shades color story over at Paper Smooches SPARKS


Thanks for stopping by today, I am so grateful to have blogging, paper crafting friends!  You inspire and enrich my life!

Have a great day,
Kara Lynne


Wednesday, June 12, 2013

Smile, It's Summer!

Summer is in full swing around here.  Tennis for both girls has started and we're going on our first camping trip this weekend to Door County, WI.  Every summer our school district offers eight weeks of one hour/4 days/week tennis for the total sum of $10.  I say, if your kid lives in Kimberly, they ought to know how to play.

I love seeing all of your bright and cheery summer cards out on your blogs so I was inspired to make a happy card today.  I was also inspired by this week's CASology challenge: Yellow.


I used the font, "Simply Gorgeous" for the word "Smile" and cut it out on white cardstock using the Silhouette SD.  I stamped the lower ducks directly on the white and fussy cut the bottom a bit.  Mamma duck is wondering how that little duck get up there.  Well, I fussy cut and foam taped him up there.  The ducks are from the LOTV stamp, Easter Sweeties.  I colored them with Copics.  I only inked parts of the stamp.  The papers are from an 8x8 pad by DCWV called Citrus stack.

My daughter, Kate (age 9), has been busy with Duct Tape these days and wanted to show you the basket she made today:


I just hope I can keep her crafty fingers occupied for the whole summer!  Thanks for coming to visit.

Have a great day,
Kara


Tuesday, June 11, 2013

Best Wishes a.k.a. Good Luck

I don't believe in luck, never have.  Therefore, I don't use the phrase, "good luck".  However, I do find myself using phrases such as, "wishing you all the best".  Isn't that the same thing?  Hmm, I'll have to ponder that one.  Meanwhile, if I'm going to encourage someone regarding future endeavors, I think I'll stick to, "May God bless you".  Okay well, I'm already making an exception on this card:
The image is LOTV's Fairies on Tiptoe (I don't believe in them either, sorry Tink).  The sentiment is LOTV's Handwritten Phrases.  The paper is from a 6x6  Prima pad called Doodle Deux, and a bit of orange cardstock I had on hand.  I used Copics to color in the fairy and added some glitter glue.  The oval was inked with Antique Linen Distress Ink and the sentiment banner was inked with Pumice Stone Distress Ink.  Gems from Michaels were colored with Copics.  Some elements were raised using Elmer's foam adhesive.

This card was inspired by the following challenges:
Lili's Little Fairies:  Good Luck!


LOTV's Ideas to Inspire:  Use a Sentiment


Thanks so much for stopping by, it really feels good to be back in the swing of things!
Have a great day!
Kara Lynne

Sunday, June 9, 2013

A Thank You to Kimberly Tracy of My Craft Spot and Jinny Newlin Her Guest Designer!

I was absolutely floored when I saw my name on Jinny's blog stating that I won a free stamp set from My Craft Spot!  Jinny's guest post was a beautiful set of Thank You notes she made as a gift for her sister.  If you haven't seen them already, you should check them out here.  So much talent!  Kimberly Tracy of My Craft Spot gave me the pick of a clear stamp set and I immediately knew I wanted the same Thank You set that Jinny used.  There's such a variety of ways to express "thank you" all on one sheet, and I was impressed with how well they ink up.  Here's my card using my new stamps:


The colors of my card were inspired by the current challenge over at Dynamic Duos
The Branch and flowers were cut on the Silhouette SD.  I cupped the flowers with a McGill shaping tool and inked the centers with Copic RV63 and Uni-ball Signo white pen before I added gems from Michaels.  I inked the sentiment with Distress Ink Brushed Corduroy.

Thanks for stopping by for a visit.
Have a great day!
Kara Lynne